
Configuring Apache Vhost on CentOS

In order for apache to accept connections from the internet and serve content to the internet, the VHOST for the domin name needs to be configured.
This article will guide you to configure a basic VHOST for a website.
Let's start creating the vhost
We will start by creating a directory sites where we will create all our Vhosts
mkdir /etc/httpd/conf/sitesThen create a sub directory for each website. I will be using example.com for this tutorial.
mkdir /etc/httpd/conf/sites/example.comEnter the example.com directory.
cd /etc/httpd/conf/sites/example.comCreate a new file using vim:
vim httpd-example.com.confNow we will be defining the Directives of the Vhost
We start with the following tags to indicate the start and end of our Virtual Host
<VirtualHost *:80>

</VirtualHost>
Next we will be definining our ServerName which is usually the DNS and ServerAlias can be any DNS which will use the same VirtualHost.
<VirtualHost *:80>
	ServerName example.com
    ServerAlias www.example.com
    ServerAlias test.example.com
</VirtualHost>
Then we will add the DocumentRoot which is where the html and the website files will be placed. The default is /var/www/html but you can set whatever path you prefer.
We will also set the directory to be available by everyone without authentication with the AllowOverride All and Require all granted directives.
<VirtualHost *:80>
	ServerName example.com
    ServerAlias www.example.com
    ServerAlias test.example.com
    DocumentRoot "/home/websites/example.com/www"
    <Directory "/home/websites/example.com/www">
		AllowOverride All
		Require all granted
	</Directory>
</VirtualHost>
We also have to configure the logging for our website namely access and error logs.
We will be using the rotatelogs binary to make Apache automatically rotate the logs each day while appending date and time to the end of the logs
The final configuration of the VirtualHost should look as follow:
<VirtualHost *:80>
	ServerName example.com
    ServerAlias www.example.com
    ServerAlias test.example.com
    DocumentRoot "/home/websites/example.com/www"
    <Directory "/home/websites/example.com/www">
		AllowOverride All
		Require all granted
	</Directory>
    ErrorLog "|/usr/sbin/rotatelogs -l /home/logs/apache/example.com/err-%Y%m%d-%H%M.log 86400"
	CustomLog "|/usr/sbin/rotatelogs -l /home/logs/apache/example.com/%Y%m%d-%H%M.log 86400" combined
</VirtualHost>
You should make sure the directories specified have been created
Now we will add a line in the main httpd.conf file which will include another conf file in the vhost.
echo "Include conf/httpd-sites.conf" >> /etc/httpd/conf/httpd.confThen we will include our newly configured vhost file in the httpd-sites.conf file
Each time a vhost is added, we will append the file the same way we are doing so that each vhost will be included in the Apache
echo "Include conf/sites/example.com/httpd-example.com.conf" >> /etc/httpd/conf/httpd-sites.confNow check your configuration for errors
apachectl configtest
Now reload Apache Configurations using one of the following.
systemctl reload httpdapachectl gracefulNow if you have firewalld and selinux enabled on your server, follow the next steps for the configuration to work.
Allow http and https service through firewalld
firewall-cmd --permanent --add-service=httpfirewall-cmd --permanent --add-service=httpsCheck if selinux is enabled:
getenforce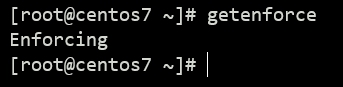
If it is Enforcing as shown above, we should check the context of the default DocumentRoot directory.
Create a file in the documentroot:
touch /var/www/html/index.htmlCheck for the selinux context
ls -Z /var/www/html/
Now check the context of the DocumentRoot directory defined in the new vhost.
ls -Z /home/websites/example.com/www
As you can see it is not the same and therefore we should make it the same:
chcon -Rt httpd_sys_content_t /home/websites/example.com/wwwAs you can see below, the context has changed
